Monday, April 10, 2017

Google Tour Builder

Virtual field trips created by you or your students.  


Are you looking for a creative way for your students to show what they are learning in your classroom?   Google Tour Builder may be the solution that allows your students to do just that. With Tour Builder you or your students will be able to plot out locations on Google Earth and then provide descriptions of that location including video and images.  These are extremely easy to put together. Simply login with your Google account and start looking for places to drop pins. Tour Builder allows you to create a digital story of locations that can then be presented in the order you specify.
Example Ideas of how a classroom teacher may use Tour Builder
  • Social Studies - Create a tour of all the major battle sites of World War II.
  • Language Arts - Mapping Fogg's Trip in “Around the World in Eighty Days”
  • Science - A timeline of the significant scientific discoveries of the 20th century mapped geographically
  • Mathematics - Virtual tour of various architecture that possess unique geometric characteristics.
  • Foreign Language - Explore the culturally significant locations of countries in which Spanish is the native language.
  • Physical Education - Create a tour of the last ten Summer Olympic venues.
  • Art - Map out the birthplaces of the ten most influential artists in history
I am sure you can come up with different ways your students can tell digital stories with this tool.   Here is a short video that provides a  teacher's perspective of Tour Builder.
How do I access Tour Builder
  1. Go to https://tourbuilder.withgoogle.com/
  2. Signin with your Google Account
  3. Click “Create a Tour”
  4. Give the tour a name and put your name in as the author, click “Create Tour”
  5. Add your content
The first slide is the introduction slide.  To add new slides which are new locations, simply click the “Add Location” button.  You can use the “Search for a location” search box to help you get to a location to drop a pin.
If you need help creating a tour, just put in a help desk ticket and choose “Tech Integration” as the category.
For more helpful information and the archive of previous Check This Out! Digests, go to http://www.greenlocalschools.org/technology.aspx

Monday, March 6, 2017

Convert PDFs to Docs

Tired of trying to assign PDFs to your students? Convert them to Google Docs.  
unnamed.pngTOgoogle docs.jpg
Every once in awhile I run across something that is so ridiculously easy, I think how did I not know about this.  Last month I attended OETC and attended a session where this trick was shown. I am sure there are many of you that already know this trick, but for those of you that don’t it may change the way you assign documents to students in Google classroom.  Converting a PDF to a Google Doc that is editable may be the format you want use when assigning a worksheet to your class.
Here is how it works:
  1. Upload the PDF to your Google Drive (put it in a folder or location that makes sense to find it later).
  2. Right click on the PDF document
  3. Choose “Open with”
  4. In the submenu choose “Google Docs”
You will see a new tab open with the Google Doc icon.  In a few seconds it will convert the PDF to a Google Doc and create a file in the same folder as the PDF that is a Google Doc.  I have created a video that demonstrates the steps.

For more helpful information and the archive of previous Check This Out! Digests, go to http://www.greenlocalschools.org/technology.aspx
Monday, February 6, 2017

Anyone Can View

Never accidently share a document with the wrong permissions again.  
Have you ever created a Google document and passed a link to that document on to your students or colleagues only to get a message from them saying they don’t have permission to view it?  That is because by default Google documents are private. You have to click on the “Share” button and change the share permissions to “Anyone with the link can view”. With everyone being so busy, it is not hard to forget to take these steps.  
Enter the “Anyone Can View” Extension
If you add the “Anyone Can View” extension, anytime you open a document that has the ability to be shared (doc, sheet, slide, etc.) the extension will become active.  If you click on the extension the document sharing permissions are changed to “Anyone with the link can view” and it copies the URL to the clipboard. The link to the document is then ready for you to paste into an email, into a Google Classroom assignment, or into social media with the correct privileges for the person to be able to view it.
This extension was created by Alice Keeler, the author of “50 Things You Can Do WIth Google Classroom”.   Watch her explanation of how the extension works.
How to install the extension
  1. Go to the Chrome Web Store
  2. Search for “Anyone Can View”
  3. Look for the “Alice Keeler Anyone Can View” extension
  4. Click add to Chrome
  5. Click add extension
You will see the “Anyone Can View” extension with this icon in the upper right corner.  Just click on this whenever you want to automatically change the permission of a Google Doc to “Anyone with the link can view”.  
~Happy Sharing

For more helpful information and the archive of previous Check This Out! Digests, go to http://www.greenlocalschools.org/technology.aspx
Monday, January 30, 2017

Black Menu for Google

This productivity extension will give you quick access to your favorite Google tools from any webpage.  
I want to thank Marc Clendaniel for showing me this extension.  If you have not added any extensions to your Google account, this would be a good one try.  Black Menu is a productivity extension, so its main role is to help you do things faster and easier.  
What does it do?
Black Menu is an extension, so once added, it lives in the upper right corner of your browser.  That means it is always available on any webpage you visit. Black Menu is a drop down menu that has a customizable list of Google Apps.  It will give you the ability to use the app from within the menu itself without leaving the page you are visiting.
What Google Apps are available?
Black Menu comes with some of the common apps already listed, but you are able to add ANY Google App that you want to the menu.  You can also remove any apps that you feel you don’t use enough to have listed in the initial menu. But the nice thing is that ALL the apps are available from the “Search Google Shortcuts” area.   
Samples of things you can do:
Here is a quick list of some of the things you can do with Black Menu.
  1. Easily add your other Google accounts to the menu.  This makes it easy to bounce back and forth between your personal account and your school account.
  2. Change the order of the apps to put the ones you use most often at the top of the menu.
  3. Remove apps from the main menu that you don’t use.
  4. Add apps to the main menu that you do use (i.e. Google Classroom)
  5. Do a Google Search from within the menu.  This keeps you from going back to the Google homepage to do a search.
  6. Gives you quick access to your Google drive AND quick access to creating new Docs, Sheets, Slides, or Forms all from within the menu.
This video shows how to add Black Menu as well as demonstrates how the items listed above work.   You can view the video [Here].

For more helpful information and the archive of previous Check This Out! Digests, go to http://www.greenlocalschools.org/technology.aspx

Tuesday, January 10, 2017

Google Keep

Google Keep can help you and your students with organization, note taking and reminders.
Maybe one of your New Year’s resolutions was to become better organized. Or better yet, wouldn’t it be great if your students had made that resolution?  Google Keep may just be the tool you and your students have been looking for to help with that organization. Google Keep essentially helps replace the post-it note with the added benefit of also being able to give you a reminder at a specific time.
What can Google Keep do?
Google Keep allows you to create a note, set a reminder to any day or time, add collaborators to the note, add images to the note, add a functional check list to the note, and create a category label for the note to help you find it later.  This can all be done very easily from your computer or mobile device.
How can I use this with my students?
There are a lot of practical uses for Google Keep with students.  Here are a few ideas;
  1. Students could make note cards of key vocabulary terms.  With the Google Keep extension they can get definitions right off of websites that you recommend. 
  2. Students can create a reminder to bring something to school.  By creating a note with a reminder set to go off when they get home, students can be reminded to get a library book to bring to class the next day, get something for a project to be done at school, or even that you asked them to do problems 1-10 in math.
  3. Students can take notes in your class.  The nice thing about taking notes in Google Keep is that the student can then color coordinate topics. For example all vocabulary is yellow, chapter main ideas are green, and Review questions are orange.  Students can also add labels to help organize and find notes quickly. With notes typed in Google Keep the student could also use the search feature to locate key words or concepts written in their notes.
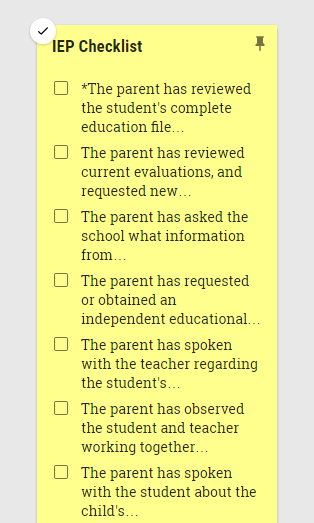
  4. Students could create a checklists.  The checklist feature allows students to make a list of steps they should follow when completing an assignment.  As the task is completed they simply click on that step and it is removed. This can be beneficial for students that have difficulty following multi-step directions.  
Do you have some ideas on how to use Google Keep with students?  Share your ideas here.
Show me how this works!
If this all sounds too good to be true, here are a few short videos showing you how it works.
Well maybe this is one New Year’s resolution you can “Keep”.
For more helpful information and the archive of previous Check This Out! Digests, go to http://www.greenlocalschools.org/technology.aspx